As this concept is so diverse in its nature we will not be able to delve too deep into it but will understand its importance and the flexibility it provides to the artist.
So why bother rendering scenes in passes when we can just render them as a single pass?
well in a production environment wheather its an all CG animation or a combination of live action and CG elements, the need to render large and complex scenes in different passes becomes necessary.If all objects in the scene are rendered all at once the computer's memory could get overloaded and crash it.
making changes in the scene becomes easy by just rendering the obects that require any correction without the need to render the whole scene again.
For things like charecters and props which are animated over time in the foreground can be rendered as a sequence and if there is no camera animation in the shot the background can be rendered just as a single image.
when working with live action plates and integrating CG charecters and objects it is necessary to render these in seperate passes so that if the charecters that are casting any shadows or appear in any reflections,having seperate passes of these helps integrate them seamlessly with the plate shot.
Adding effects like glows,depth of field,motion blur or just doing some color correction becomes easy without depending on doing theses in a 3D package like maya where they are render expensive.
Maya's render layers provide an easy and efficient workflow in creating multiple render passes which can later be composited togeather in compositing applications like aftereffects,combustion,Digital fusion,shake,nuke or the very awesome photoshop if the image is going to be a still.
So lets get started with a simple example here,when iam done lighting the scene i start creating the render layers depending on the passes I require.
I have a very simple scene here with a tyre which is being lit by a directional light casting a raytraced shadow with the default settings.
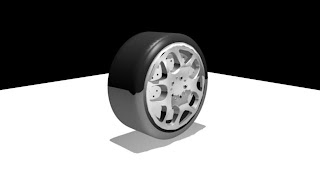 The first pass i will be creating is going to be the Beauty pass and guess what you have just rendered it.the pass that contains all the the elements such as diffuse,ambient and specular etc. is called a beauty pass,only thing i would need to do is to not include the shadow which is being cast on to the plane here.Iam going to create a seperate pass for it.Having said that i could also render the plane seperately so that i can have more control in the composite.
I start off by toggling the layer button to render layers then selecting all the objects in the scene the plane,tyre and the light and click on the second button which creates a layer with the selcted objects I rename this layer as beauty pass.All you need to do here is to go into the attributes of the directional light and uncheck the use raytraced shadows option,when you do this the attribute turns orange indicating a layer override.
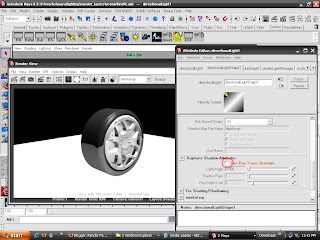
and thats it the beauty layer is done,now its time to create the ambient occlusion pass and for this I select just the tyre and the plane and click on the second button in the render layers section because the light is not required for this I will not include it in this pass.To create the occlusion pass just right click on the layer and from the presets select occlusion.
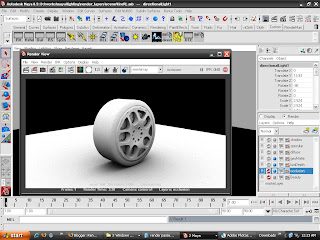
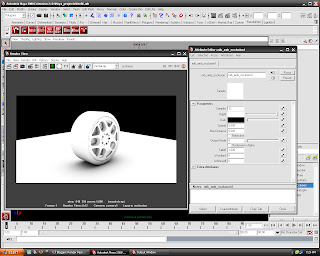
To change the setting on the occlusion pass you can click on the blue ball icon in the render layer to open up the attributes of the surface shader to which the ambient occlusion texture node is connected.click on the input of the out color to expose the occlusion parameters,the samples parameter takes care of the total number of occlusion rays in the scene.you can use 32 rays for this to get good results.The other I would like to change is the max distance which is set to 0 by default,this means maya will calculate the max distance to be occluded.This parameter works in terms of maya's units,i.e. if you put 1 here it means 1 maya's grid unit.You can give anything between 2 to 5 here to get good results,so that it will only occlude the specified number of units that you have set.Doing this will also speed up my render time.
 Iam going to create the diffuse pass now,this pass will contain only the diffuse component in the rendered image.I will create another render layer by selecting everything again from the master layer.I will rename this layer to diffuse,right click on it and from the presets choose diffuse.If you render this layer you should see something as the following image below.
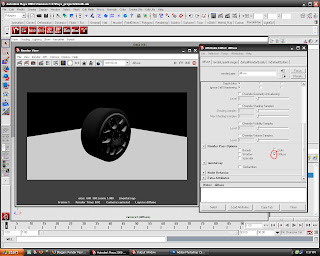 If you click on the flag icon on the render layer of the diffuse pass you can see the diffuse option checked in the render pass section of the attributes.This is another way of creating the passes.
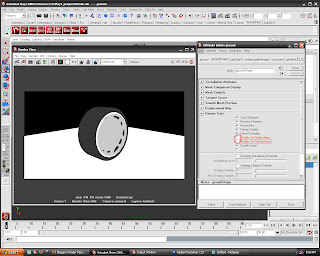
Now its time to create the ambient pass,If you have noticed there is no preset available in maya to create this pass.The ambient pass can be easily created by selecting the geometry and creating another render layer,this time Iam not going to include the light in this layer.Iam actually going to create a new ambient light into this layer.In the ambient light Iam going to set the ambient shade to 0.I also need to override the reflection parameter from the tire so that the reflections are not included in the pass.so select the tyre and go into the attributes editor>tire shape>render stats unckeck the visible in reflections and visible in refractions options.Do the same for the plane.
contd.
